Bringing Nostalgia to Life: The Art of the Retro Wave 3D Shadow Box Paper Cut SVG
Hello, crafters. If you have ever felt that traditional paper cutting was a bit too flat or lacked the dramatic flair needed for modern home decor, it is time to look closer at the Retro Wave 3D Shadow Box Paper Cut SVG. This isn't just another template; it is an invitation to create depth, dimension, and nostalgia in a single project. By combining the aesthetic of 80s synth-wave culture with the tactile joy of layering paper, this design offers a unique way to transform simple sheets into a striking visual experience.
The beauty of this specific template lies in its balance. It is square, structured, and meticulously designed to be layered. But more importantly, it is accessible. Whether you are a seasoned pro with a Cricut machine or a beginner holding your first pair of scissors, this project provides a rewarding challenge that results in a piece of art worth displaying. Let’s dive into what makes this template so special, how to work with it, and why it deserves a spot on your next crafting weekend.
Understanding the Design: Layers and Dimensions
At its core, the Retro Wave 3D Shadow Box Paper Cut SVG is a study in geometry and perspective. The design consists of seven distinct layers. Why seven? Because that is the sweet spot for creating significant depth without making the assembly process overly complicated or fragile. Each layer serves a purpose, building upon the last to create a cohesive image that pops off the page when viewed from the front.
The dimensions are set at 20.32×20.32 cm (which is exactly 8×8 inches). This is a crucial detail for anyone planning their workspace. An 8-inch square is large enough to be seen as a statement piece but small enough to fit comfortably on most standard cutting mats. It also means that you do not need massive sheets of cardstock to complete the project, reducing waste and cost. However, because the file is vector-based, size is flexible. You can scale this up for a grand wall installation or down for a smaller shadow box frame, provided you maintain the aspect ratio to ensure the layers align correctly.
File Formats and Machine Compatibility
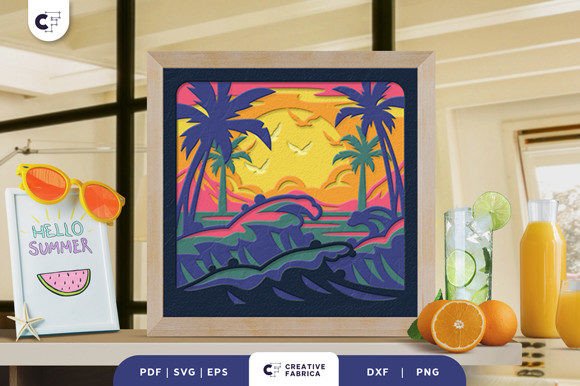
One of the strongest selling points of digital cut files is their versatility. When you purchase this template, you aren't locked into a single method of creation. You will receive the design in five different formats: SVG, PDF, EPS, PNG, and DXF. This variety ensures that no matter what tools you have available, you can bring this design to life.
- SVG (Scalable Vector Graphics): This is the gold standard for digital cutting machines like the Cricut Maker, Silhouette Cameo, and Brother ScanNCut. The SVG file allows your machine to read the precise paths needed to cut through the paper cleanly. It is editable, meaning you can adjust the settings within your software before sending the job to the cutter.
- PDF: For those who prefer to print and cut by hand, the PDF is essential. It provides high-resolution vector lines that can be printed directly onto your chosen paper stock. You can then trace these lines with a pencil or use them as a guide for your art knife.
- EPS and DXF: These formats are particularly useful for professional designers or users of specialized software like Adobe Illustrator or CorelDRAW. They offer robust vector data that can be manipulated further if you wish to add custom text or modify elements of the retro wave aesthetic.
- PNG: While primarily a raster image format, the included PNG serves as a quick reference preview. It helps you visualize the final composition before you commit to cutting, ensuring you understand the layout of the seven layers.
If you do not own a cutting machine, do not worry. The inclusion of the PDF and clear layer instructions makes manual cutting entirely feasible. It requires patience and a steady hand, but the result is just as impressive. Using a sharp art knife on a self-healing mat is often preferred over scissors for intricate details, as it allows for tighter turns and cleaner edges.
Material Matters: Choosing the Right Cardstock
The success of any shadow box project hinges on the material you choose. Thin paper might tear easily during the peeling process, while thick cardboard might be difficult to cut or glue. The recommended specification for this Retro Wave 3D Shadow Box Paper Cut SVG is Encore Cardstock, specifically the 80 lb cover weight (216 gsm).
Why this weight? 80 lb cover cardstock strikes the perfect balance between durability and workability. It is stiff enough to hold its shape once assembled, preventing the layers from bowing or warping over time. Yet, it is thin enough that a Cricut blade can slice through all seven layers simultaneously with minimal pressure adjustments. If you are cutting by hand, this weight is manageable for most crafters, though very fine details may require multiple passes with your blade.
When selecting colors, consider the "Retro Wave" theme. Think neon pinks, electric blues, deep purples, and stark blacks. The contrast between layers is what creates the 3D effect, so avoid using shades that are too similar in value unless you intend for them to blend seamlessly. Experimenting with metallic or glitter cardstocks can add an extra layer of glamour, mimicking the reflective surfaces often found in 80s sci-fi aesthetics.
Assembly and Display Options
Once your layers are cut, the real fun begins: assembly. You will need a strong adhesive. Glue dots, double-sided tape, or a precision liquid glue pen work best. Liquid glue can sometimes warp thin paper if applied too liberally, so precision is key. Start from the back layer and work your way forward, ensuring each layer is centered and aligned perfectly. Even a millimeter of misalignment can throw off the entire illusion of depth.
So, what do you do with your finished masterpiece? There are two primary ways to display the Retro Wave 3D Shadow Box Paper Cut SVG.
- Framed Wall Decor: Place the assembled layers inside a deep-set frame, often called a shadow box frame. The depth of the frame accommodates the layers, allowing light to cast subtle shadows behind the paper, enhancing the three-dimensional feel. This is a sophisticated, low-maintenance option that fits well in living rooms, offices, or gaming dens.
- Illuminated Light Box: For a truly immersive experience, insert LED strip lights between the layers. The light will shine through the negative space of the cutouts, turning your paper art into a glowing neon sign. This method captures the essence of the retro wave genre perfectly, evoking the glow of arcade cabinets and sunset drives. It transforms the artwork into a functional nightlight or ambient lamp.
Practical Considerations and Final Thoughts
Before you start cutting, keep a few practical tips in mind. First, always test your cut settings on a scrap piece of the same cardstock. Different brands of paper can behave differently, and adjusting blade depth or speed can save you from ruined materials. Second, organize your layers immediately after cutting. Use a drying rack or simply stack them in order with rubber bands. It is incredibly frustrating to lose track of which layer is which when you are ready to glue.
Also, remember that images are for preview purposes only. The actual final product color may vary slightly depending on your lighting sources and the specific batch of paper color you purchase. Natural light tends to show true colors, while warm indoor lighting can shift hues toward yellow or orange. Plan your display accordingly.
This template is more than just a craft project; it is a gift idea waiting to happen. A handmade, illuminated shadow box is a deeply personal gift for a friend, family member, or partner who appreciates retro aesthetics. It shows effort, creativity, and attention to detail—qualities that store-bought items rarely possess.
Incorporating the Retro Wave 3D Shadow Box Paper Cut SVG into your crafting routine allows you to merge digital convenience with analog satisfaction. It respects your time by providing precise, machine-ready files while still offering the therapeutic benefits of hands-on assembly. Whether you are framing it for your wall or wiring it for a light box, you are left with a tangible piece of art that celebrates both modern technology and classic style. So, grab your cardstock, fire up your machine, and let’s make some magic happen.