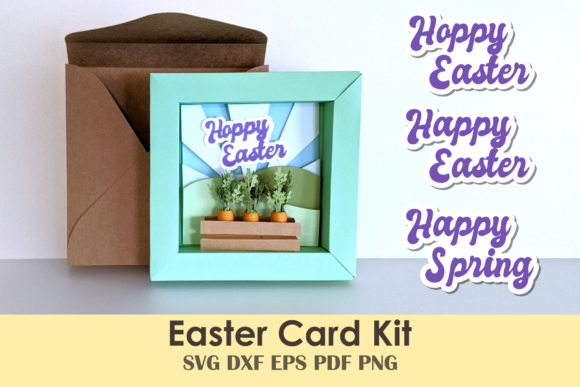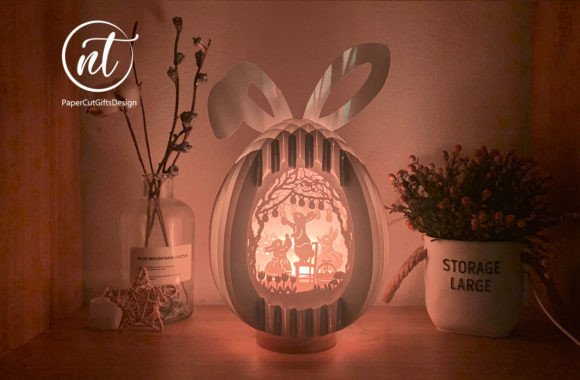
DIY Easter Egg Popup 3D Files
The intersection of traditional paper crafting and modern digital design has given rise to a fascinating category of creative projects: DIY Easter Egg Popup 3D Files. These are not merely static images or simple cutouts; they are intricate, multi-layered architectural marvels constructed entirely from paper. The defining characteristic of this craft is its reliance on precision engineering rather than adhesive. Everything is assembled into a unified whole without the use of glue, relying instead on precise folds, slots, and tabs that interlock to create a stable, three-dimensional structure.
For creators, designers, and hobbyists alike, this project offers more than just a seasonal decoration. It serves as an excellent exercise in patience, spatial reasoning, and attention to detail. While assembling the layers can be challenging for beginners, requiring a steady hand and careful execution, the result is deeply rewarding. The process transforms flat sheets of paper into a dynamic object that can be easily folded into a compact, flat form for storage or gifting, and then effortlessly unfolded to reveal a stunning 3D shape. When combined with lighting elements, such as LED strips, these paper sculptures take on an ethereal quality, casting beautiful shadows and illuminating the intricate details of the egg’s interior.
The Mechanics of Glueless Assembly
What sets DIY Easter Egg Popup 3D Files apart from other papercraft models is the elimination of wet adhesives. This approach ensures a cleaner workspace and allows for potential disassembly or correction if a fold is misaligned during the initial stages. The files provided typically include multiple formats—SVG, PDF, and PNG—to accommodate different cutting methods and skill levels. Each layer is designed to slot into the next, creating a stack that expands vertically when pulled open. This mechanism is similar to complex pop-up cards but scaled up and refined for aesthetic impact.
The difficulty level is moderate. For those new to layered papercraft, it requires patience. You must be meticulous when cutting along the lines and folding along the creases. However, this challenge is part of the appeal. The satisfaction comes from seeing how disparate pieces come together to form a cohesive, structural whole. It is a tactile experience that slows down the creative process, encouraging mindfulness and focus. Once mastered, the assembly becomes a rhythmic, enjoyable ritual that results in a tangible piece of art.
Essential Tools and Materials
To bring these designs to life, you need a specific set of tools and materials. The quality of your final product is directly related to the care you take in preparation. Here is what you will need:
- Printer: A high-quality inkjet or laser printer is essential for clear, crisp lines. Whether you are printing PDFs directly or using them as guides for tracing, legible lines prevent cutting errors.
- Cutting Tool: You have two primary options here. First, an art knife (such as an X-Acto knife) paired with a self-healing cutting mat. This method offers the most control and is ideal for small, intricate details. Second, a Cricut machine or similar vinyl cutter. If you own a Cricut, this will significantly speed up the process and ensure perfect consistency across all layers. The SVG files are particularly useful here, as they can be sent directly to the machine for automated cutting.
- Paper: Weight matters. You need approximately 30 sheets of A4 paper (21x29.7cm). The recommended weight is 250 gsm. Lighter paper may tear under the stress of folding or fail to hold its shape, while heavier cardstock might be too thick to fold cleanly or fit into the tight slots. 250 gsm strikes the perfect balance between durability and flexibility.
- Lighting Elements: To elevate the project from a paper model to a light fixture, incorporate RGB LED strips with a power supply or LED Fairy String Lights. These should be installed before the final layers are locked into place, ensuring the wires are hidden within the structure.
Creative Applications and Variations
While the name suggests a seasonal focus on Easter, the versatility of DIY Easter Egg Popup 3D Files extends far beyond holiday decor. The underlying geometry—a symmetrical, organic shell revealing an inner landscape—is adaptable to numerous themes and uses.
Home Decor and Ambient Lighting
The most popular application is as a decorative lamp. By placing RGB LED lights inside the hollow center of the egg, you can create a mesmerizing nightlight or ambient accent piece. The layered paper diffuses the light, creating soft gradients and shadows that change depending on the angle of view. You can customize the color scheme to match your room’s decor, shifting from warm whites for a cozy atmosphere to vibrant hues for parties. Because the egg can be folded flat, it is also space-efficient, making it easy to rotate decorations seasonally.
Educational Tools for STEM Learning
For educators and parents, these files offer a practical way to teach concepts in geometry, engineering, and fine motor skills. Assembling the layers demonstrates principles of structural integrity and load distribution. Teachers can use the project to discuss symmetry, fractals, or even the biological structure of eggs. The step-by-step nature of the assembly encourages problem-solving and resilience, as students learn to troubleshoot misalignments without frustration.
Gift Packaging and Personalization
Entrepreneurs and small business owners can utilize these designs for unique packaging. Imagine a luxury brand sending a gift wrapped in a flat-packed box that the recipient unfolds to reveal a 3D branded logo or artistic motif. The "reveal" moment creates a memorable unboxing experience. Hobbyists can personalize the design by coloring the layers before assembly, adding patterns, or embedding small trinkets within the layers for a surprise element.
Digital Art and Content Creation
Bloggers and social media influencers can leverage the visual appeal of these projects for content creation. The contrast between the flat, technical file and the final, illuminated 3D object makes for compelling video content. Time-lapse videos of the assembly process, especially when using a Cricut, perform well on platforms like TikTok and Instagram. Furthermore, the ability to display the finished product in various lighting conditions provides endless opportunities for photography and styling.
Best Practices for Success
To ensure your DIY Easter Egg Popup 3D Files project is a success, consider the following recommendations:
- Test Print First: Before committing to all 30 sheets, print one full set on scrap paper to verify the scale and alignment of the slots. This saves material and prevents frustration.
- Pre-Fold Creases: Use a bone folder or the blunt edge of a butter knife to score and pre-fold all crease lines before attempting to assemble. This ensures sharp, clean folds that hold their shape.
- Plan Your Wiring: If using LEDs, route your wires carefully. Ensure there is enough slack to allow the egg to expand and contract without pulling the connections loose. Secure the battery pack externally or in a designated pocket within the base layer.
- Layer Order: Pay close attention to the numbering or labeling of the layers. Assembling them out of order will result in a structure that does not lock together correctly.
If you encounter any issues with the file formats, such as scaling problems or missing paths, do not hesitate to reach out to the creator. Support is often available to help troubleshoot technical difficulties, ensuring that your focus remains on the joy of creation rather than software glitches.
Conclusion
DIY Easter Egg Popup 3D Files represent a blend of digital precision and analog craftsmanship. They invite you to slow down, engage your hands, and create something truly unique. Whether you are a seasoned designer looking for a new medium, a teacher seeking engaging classroom activities, or simply someone who appreciates the beauty of light and shadow, this project offers a fulfilling creative outlet. With the right tools and a bit of patience, you can transform simple sheets of paper into a glowing, three-dimensional work of art that celebrates both tradition and innovation.