Transforming Digital Designs into Tangible Magic: A Guide to Candle 3D Papercraft and Flameless Tea Light Decor
In the world of modern crafting, the line between digital design and physical art has never been more blurred. One of the most enchanting intersections of these two realms is Candle 3D Papercraft. This hobby allows creators to transform simple sheets of paper into intricate, glowing sculptures that bring warmth and ambiance to any space. Whether you are a seasoned crafter looking for your next project or a beginner curious about what digital cutting machines can achieve, understanding how to build and use these structures is both rewarding and accessible.
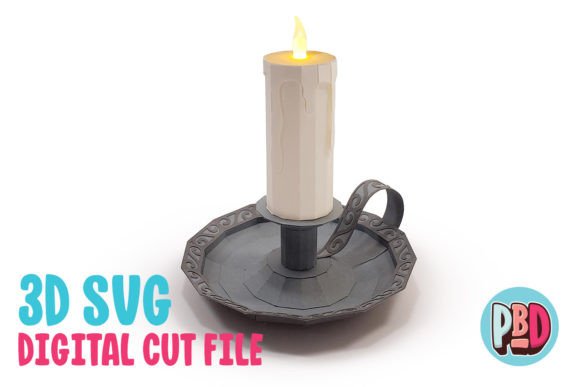
At the heart of many successful papercraft projects lies a specific, versatile component: the flameless tea light. When paired with a well-designed 3D structure, such as a standard-sized holder measuring 6 inches wide by 6 inches deep by 6 inches high, the result is a stunning decorative piece suitable for Christmas, Halloween, weddings, or everyday home decor. This article explores the mechanics of this craft, the technology behind it, and how you can successfully bring these designs to life using popular software and hardware platforms.
The Allure of Flameless Tea Lights in Papercraft
Why do so many 3D papercraft designs revolve around the humble tea light? The answer lies in safety, versatility, and atmosphere. Traditional candles pose a fire risk when placed inside enclosed paper structures, which can be highly flammable. Flameless tea lights, however, provide the warm, flickering glow of a real candle without the heat or open flame. This makes them the perfect power source for delicate paper creations.
The standard 38mm flameless tea light is particularly favored by designers because it fits perfectly into the majority of commercially available 3D papercraft models. These lights often come with battery-operated timers or remote controls, allowing users to set a schedule for their decorations. Imagine a wedding aisle lined with intricate paper lanterns that turn on automatically at dusk, or a Halloween centerpiece that glows eerily from within a carved paper pumpkin structure. The possibilities are limited only by your imagination.
For event planners and DIY enthusiasts, these lights offer a cost-effective way to create high-impact visuals. They require minimal maintenance—simply replace the batteries when needed—and they eliminate the worry of wax dripping onto expensive tablecloths or carpeting. Furthermore, because they are cool to the touch, they can be safely handled during assembly and placement, making them ideal for children’s parties or educational settings.
Understanding the Digital File Ecosystem
To create a 3D papercraft model, you first need the blueprint. In the digital crafting community, these blueprints are delivered as downloadable files, typically compressed in a single ZIP archive. Before you can begin cutting, it is crucial to understand the different file formats included in these downloads, as each serves a specific purpose depending on the software you use.
A typical download for a 3D papercraft kit includes:
- SVG Cut Files: Scalable Vector Graphics (SVG) are the gold standard for modern cutting machines. They contain clean, editable paths that allow for precise scaling without losing quality. SVG files are generally preferred for their ease of use and superior performance in design software.
- DXF Cut Files: Drawing Exchange Format (DXF) files are an older but widely compatible format. They are essential for users who rely on basic versions of cutting software that may not support SVG imports.
- PDF Instructions: While the vector files tell the machine where to cut, the PDF provides the human instructions. It details how to score folds, apply glue, and assemble the pieces in the correct order. Never skip reading these instructions, as 3D assembly can be tricky.
It is important to note that all files will need to be extracted from the ZIP folder before they can be opened. Attempting to open a file directly from within a compressed archive can sometimes lead to errors or corrupted data, so always extract the contents to a dedicated folder on your computer first.
Software Compatibility and Technical Setup
Once you have your files extracted, the next step is choosing the right software platform. The most popular tools for papercrafters are Cricut Design Space and Silhouette Studio. However, compatibility varies significantly between the two, and understanding these differences can save you hours of frustration.
Using SVG Files with Advanced Software
If you are using Silhouette Designer Edition or higher, or Cricut Design Space, you should prioritize using the SVG files. These programs are optimized for vector graphics and will render the lines cleanly, ensuring that your cutting machine follows the path accurately. SVG files also allow you to easily resize the design if you wish to make a larger or smaller version of your candle holder, although changing the size may affect the structural integrity of complex joints.
Navigating DXF Files in Basic Software
Users of Silhouette Basic Edition or other entry-level platforms often find that they cannot import SVG files due to licensing restrictions. For these users, the DXF file is the key to unlocking the design. However, DXF files can be finicky. They often open slowly in Silhouette Studio and may not appear as "clean" as SVG files, meaning there might be extra nodes or overlapping lines that need to be cleaned up manually.
To ensure your DXF file loads properly, you must adjust your software preferences. Incorrect settings can result in a blank canvas or a distorted image. Follow these steps carefully:
- Edit Preferences in your software menu.
- Select the Import DXF option.
- Open the file dialog box.
- Change the setting from “As-is” to “Centered.”
This "Centered" setting ensures that the design is positioned correctly on your virtual mat, preventing cutting errors where the blade might move off the material. Please remember that while DXF files work, they are technically inferior to SVGs in terms of precision and ease of handling. If possible, even Basic Edition users should look for workarounds to use SVGs, or consider upgrading their software if they plan to engage in frequent papercrafting.
Material Selection and Assembly
The success of your 3D papercraft project depends heavily on the materials you choose. The instructions for most 6x6x6 inch candle holders specify the use of medium cardstock. This weight of paper is critical; it is thick enough to hold its shape and support the weight of the tea light, yet thin enough to fold sharply along the score lines.
Lighter papers, such as standard printer paper, will likely collapse under their own weight or fail to maintain the rigid structure required for a 3D object. Conversely, heavier cardstock or chipboard may be too difficult to cut cleanly with standard blades or may tear when folding. Medium cardstock strikes the perfect balance between durability and workability.
When assembling, patience is your best tool. Use a bone folder or a blunt butter knife to crease the score lines firmly. This creates sharp, professional-looking edges. Apply glue sparingly, using a small brush or toothpick to place adhesive only where indicated in the PDF instructions. Excess glue can seep through the paper, creating unsightly stains that detract from the final aesthetic. Allow sufficient drying time between steps to ensure the structure is stable before adding the next layer.
Practical Applications and Creative Ideas
Once your Candle 3D Papercraft is complete, the real fun begins. These pieces are incredibly versatile. During the holiday season, create clusters of varying heights to form a festive mantel display. The warm glow of the flameless tea lights reflects beautifully off the white or colored cardstock, creating a cozy atmosphere.
For weddings, these crafts can serve as unique centerpieces. By choosing elegant colors like ivory, gold, or blush pink, and pairing them with delicate lace patterns in the SVG design, you can create a sophisticated look that matches any theme. Because they are lightweight, they are easy to transport and set up, reducing stress for brides and event coordinators.
Halloween offers another creative avenue. Darker cardstocks in black, orange, or purple, combined with spooky motifs, can turn these candle holders into eerie ambient lighting for haunted houses or porch decorations. Since there is no real flame, you can leave them unattended outdoors without fear of wind blowing out a candle or starting a fire.
Conclusion
Candle 3D Papercraft is more than just a pastime; it is a testament to the power of combining digital technology with traditional craftsmanship. By understanding the nuances of file formats like SVG and DXF, selecting the appropriate software, and choosing the right materials, anyone can create beautiful, functional art. Whether you are decorating for a special occasion or simply enjoying a quiet evening of creativity, the combination of a well-built paper structure and a gentle flameless tea light offers a magical experience that is both safe and sustainable. As you explore this hobby, remember to experiment with different designs and materials, letting your creativity guide you to new and exciting shapes.